At the ripe old age of 24, Robohelp is the granddaddy of online help and looks it. The familiar layout of folders on the left and topic pages on the right hasn’t changed much over time and appears particularly dated in an era of touchscreens, responsive web pages, and mobile apps.
However, you might be in a situation where Robohelp is the only tool available. It’s possible to tweak Robohelp layouts so that topic pages look clean and professional. For this article, I’ll assume you are familiar with using Robohelp, including the Header Template file that controls the look and feel of all topic pages.
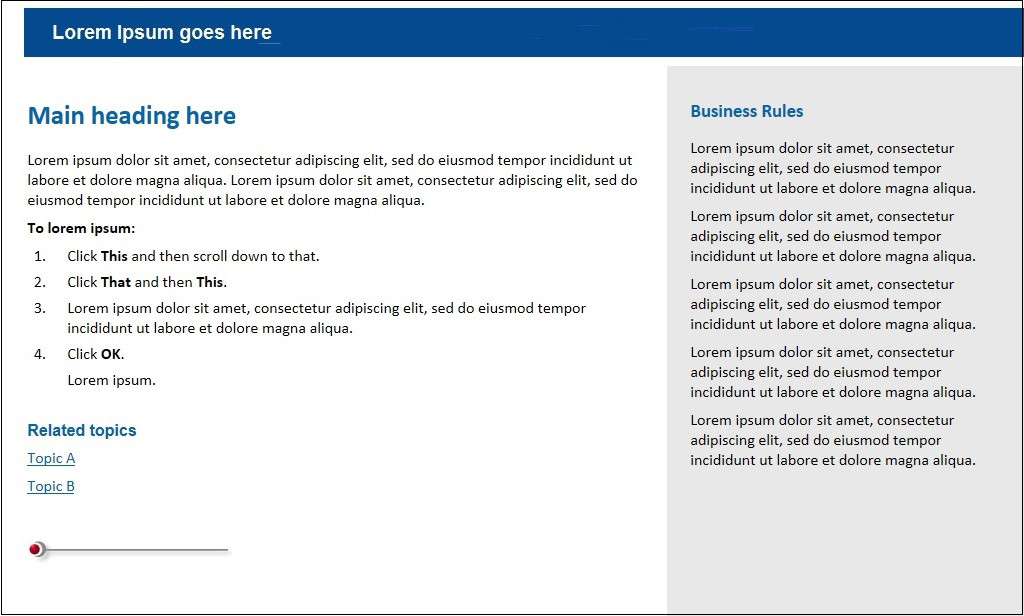
Here’s a topic page layout I did recently for a client using Robohelp 11, with the output to be viewed by staff on desktop monitors:
Note this layout is not designed for tablet or smartphone viewing. Topic pages are set up as a three-column grid, with procedures running over two columns on the left side, and business rules running in a shaded column on the right.
A graphic banner anchors the top of the page, and a Robohelp-supplied “redheader.jpg” graphic defines the bottom of the procedure section, after the “Related Topics” section.
This layout requires tables, which give you control over the line length in the procedure section. Unfortunately online help is often laid out so that text lines can run the full width of the browser window, making the page virtually unreadable on the typical desktop monitor.
I usually set a paragraph left and right indent as well, to create white space around the text blocks. I set 0 pt above, and 6 pt below to set spacing between paragraphs. I set leading as 12/14 or 12/16 to open up the text lines a bit.
The print button upper right is just a chunk of JavaScript inserted into Robohelp’s HTML window. Users can click the button and print out any help page.
Here are the key steps to set up the master page for this layout in Robohelp 11. Make any appropriate adjustments for the version you’re using.
Step one: open the Robohelp Header Template
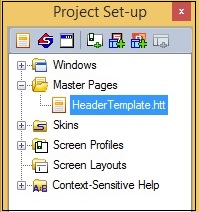
- Click View > Pods > Project Set-up.
The Project Set-up pane displays.
- Expand the Master Pages folder and select the Header Template:
The Header Template displays on the right.
Step two: set up the tables in the header and footer
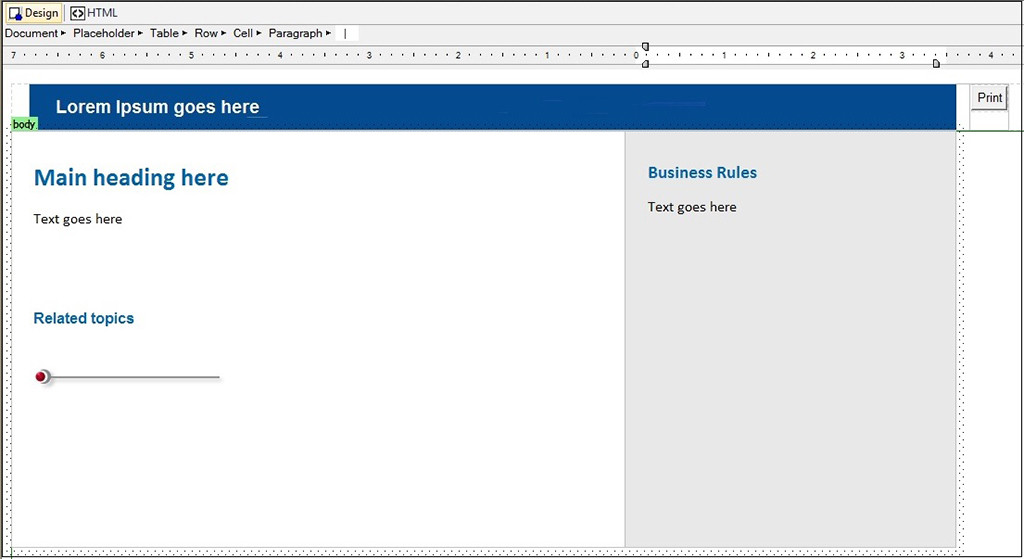
- In the header space, insert a table that’s 1 row by 2 columns.
- Remove any cell borders and set the table width to 1020 pixels.
- In the first cell, import a banner graphic that’s 1000 pixels wide, 50 high.
- Change from Display to HTML view and paste the HMTL Print button code (see below for the code) into cell 2.
- In the body area of the page, insert a table that’s 1 row by 2 columns.
- Remove cell borders and set the width to 1020 pixels.
- Set the column widths to 66% for column 1 and 34% for column 2. Change the colour of the second cell to a light gray.
Step three: apply formatting to the body of the Header Template
- Customize the styles for the three heading levels.
- Type “Main heading” and “Related Topics” in the first cell and format with Heading 1 and Heading 2 styles.
- Insert a coloured sword from Robohelp’s image directory below the Related Topics heading.
- Type “Business Rules” in the second cell.
- Your screen should look something like this:

- Save the Header Template page.
- Create some new topic pages to test the layout.
- Adjust the Header Template if necessary, and you’re done.


